Data recovery is the process of retrieving inaccessible, lost, corrupted, or formatted data from storage media when normal access methods fail. Here’s a structured overview of essential concepts:
1. Types of Data Loss
- Logical Failure: File system corruption, accidental deletion, formatting, virus infection, or software bugs—media remains physically intact.
- Physical Failure: Mechanical/electronic damage to storage devices (e.g., head crashes, PCB failure, water/fire damage).
- Firmware Corruption: Controller/microcode issues preventing device recognition.
- Human Error: Accidental deletion, improper partitioning, or overwriting.
- Natural Disasters: Fire, flood, or extreme environmental damage.
2. Recovery Approaches
| Approach | When Used | Key Principle |
| Logical Recovery | Deleted files, formatted drives, corrupted partitions | Analyze file system structures (MFT in NTFS, inodes in ext4) to locate orphaned data |
| Physical Recovery | Clicking drives, non-detected devices | Requires cleanroom environment; component replacement (heads, PCB) or imaging failing media |
| Raw/Signature Recovery | Severely corrupted file systems | Scan raw sectors for file signatures (e.g., PK for ZIP, FF D8 for JPEG) |
| RAID Reconstruction | Failed/misconfigured RAID arrays | Rebuild array geometry (stripe size, order, parity algorithm) before extracting data |
3. Critical File System Concepts
- Unallocated Space: Sectors not assigned to active files—often contains recoverable deleted data.
- Slack Space: Unused portion of the last cluster allocated to a file—may hold remnants of previous data.
- Journaling: File systems like NTFS/ext4 maintain transaction logs that can aid recovery after crashes.
- TRIM/SSD Challenges: SSDs with TRIM enabled may permanently erase deleted data quickly—recovery windows are shorter than those of HDDs.
4. Golden Rules of Recovery
- Stop using the device immediately after data loss—new writes overwrite recoverable data.
- Create a forensic image (bit-for-bit copy) before attempting recovery—work on the image, not original media.
- Never recover to the same drive you’re recovering from.
- For physical failures: Power off immediately—continued use can cause irreversible damage.
5. Common Tools & Techniques
- Software Tools:
- Open Source: TestDisk (partition recovery), PhotoRec (signature-based), ddrescue (imaging failing drives)
- Commercial: R-Studio, UFS Explorer, GetDataBack
- Hardware Tools: PC-3000 (for firmware-level recovery), write blockers (forensic imaging)
- Cloud Recovery: Version history (OneDrive/Google Drive), snapshot restoration (AWS EBS, Azure)
Data Recovery Tools: Comprehensive Guide (2026)
A strategic approach to data recovery requires matching the right tool to the failure type. Below is a structured overview of software, hardware, and forensic tools—categorized by use case, capability, and professional tier.
1. Failure-Type Decision Matrix
| Failure Type | Recommended Approach | Tools Category |
| Accidental deletion / formatting | Software recovery (logical) | Consumer/pro tools (Recuva, R-Studio) |
| Corrupted file system | File system repair + raw recovery | TestDisk, UFS Explorer |
| Physical drive failure (clicking, not detected) | Hardware imaging → software analysis | PC-3000 + cleanroom services |
| Accidental deletion/formatting | Array reconstruction | R-Studio, UFS Explorer, Runtime RAID |
| SSD with TRIM enabled | Limited recovery window | Early intervention critical; specialized tools |
| Encrypted drives (BitLocker/FileVault) | Key recovery first | Elcomsoft Forensic Tools, Passware |
| Mobile devices (iOS/Android) | Physical/logical extraction | Cellebrite, Magnet AXIOM, open-source alternatives |
| Cloud storage | Version history / API recovery | Native platform tools (OneDrive, Google Vault) |
⚠️ Golden Rule: For physical failures—power off immediately and consult a professional. DIY attempts often cause irreversible damage.
2. Software Recovery Tools (Logical Failures)
🔹 Free / Open Source
| Tool | Best For | Strengths | Limitations |
| TestDisk | Partition recovery, MBR repair | CLI; recovers deleted partitions; cross-platform | Steep learning curve; no GUI wizard |
| PhotoRec | Raw file carving (by signature) | Recovers 480+ file types; ignores file system | No filenames/folder structure; high false positives |
| ddrescue (GNU) | Imaging failing drives | Skips bad sectors → retries later; minimizes stress | CLI only; requires Linux/WSL |
| Recuva (Piriform) | Quick undelete (Windows) | Simple GUI; portable version available | Limited deep scan; ineffective after TRIM/overwrite |
| DMDE | Partition/file recovery | Fast scan; recovers complex RAID layouts | Free version limited to 4000 files per folder |
💡 Pro Tip: Use PhotoRec + TestDisk together—TestDisk for partition structure, PhotoRec for raw file carving when the file system is destroyed.
🔹 Commercial (Professional Tier)
| Tool | Price | Key Differentiator | Ideal Use Case |
| R-Studio | ~$80–$180 | Cross-platform; handles complex RAID/HFS+/ext4 | Multi-OS environments; enterprise servers |
| UFS Explorer | ~$90–$150 | Unified interface for 30+ file systems (incl. APFS, ZFS) | Heterogeneous storage; forensic readiness |
| GetDataBack | ~$80–$120 | Specialized NTFS/FAT recovery; intuitive wizard | Windows-centric recovery; non-technical users |
| Stellar Data Recovery | ~$50–$150 | All-in-one suite (incl. photo/video repair) | Consumer/SMB use; marketing-heavy UI |
| Disk Drill | Freemium | macOS focus; Recovery Vault feature (pre-loss protection) | Mac users; preventative monitoring |
✅ Enterprise Recommendation: R-Studio or UFS Explorer Professional for flexibility across Windows/Linux/macOS file systems and RAID configurations.
3. Forensic & Hardware Tools (Physical Failures)
🔹 Hardware Imaging & Write Blocking
| Tool | Purpose | Critical For |
| Tableau T8/T3560 | Forensic write blocker + fast imaging | Legal evidence preservation; chain of custody |
| WiebeTech Forensic UltraDock | SATA/IDE write blocker + duplicator | Field acquisitions; first responders |
| PC-3000 (ACE Lab) | Firmware-level recovery; heads/PCB diagnostics | Clicking drives, PCB replacement, donor matching |
| DeepSpar Disk Imager | Sector-by-sector imaging of unstable drives | Skip bad sectors; resume interrupted imaging |
⚠️ Never image directly to the failing drive—always use a write blocker or image to separate healthy media.
🔹 Professional Recovery Services (When DIY Fails)
| Provider | Specialty | Typical Cost Range |
| DriveSavers | Cleanroom recovery; enterprise SLAs | $500–$2,500+ |
| Ontrack | Global presence; RAID/server arrays | $300–$3,000+ |
| Gillware | Transparent pricing; free diagnostics | $400–$2,000 |
| ACE Data Recovery | Complex RAID/enterprise storage | $1,000–$5,000+ |
💡 Cost-Saving Tip: Many services offer free diagnostics—get a quote before committing. If data isn’t critical, weigh cost vs. value.
4. Specialized Scenarios
🔹 SSD / NVMe Recovery
- Challenge: TRIM command purges deleted data blocks quickly (often within minutes/hours)
- Tools: UFS Explorer (supports NVMe), PC-3000 SSD Edition
- Strategy:
- Power off the SSD immediately after deletion
- Disable TRIM temporarily (fsutil behavior set DisableDeleteNotify 1 on Windows—not recommended for production)
- Image drive before OS mounts it (boot from Linux USB)
🔹 RAID Recovery
| RAID Level | Recovery Complexity | Tool Recommendation |
| RAID 0 | High (no redundancy) | R-Studio, Runtime RAID Reconstructor |
| RAID 5 | Medium (1 disk fault tolerance) | UFS Explorer RAID Edition |
| RAID 6 | Medium-High | Requires exact stripe size/order/rotation |
| RAID 10 | Medium | Mirror pair recovery first, then stripe |
⚠️ Never initialize/rebuild RAID blindly—incorrect parameters destroy data permanently.
🔹 Mobile Device Recovery
| Device | Tool | Access Level |
| Android (rooted) | ADB + dd imaging | Full physical extraction |
| Android (non-rooted) | Dr.Fone, Magnet AXIOM | Logical backup only |
| iOS (locked) | Cellebrite UFED, GrayKey | Requires legal authorization |
| iOS (iTunes backup) | Elcomsoft Phone Breaker | Decrypts local backups with password |
⚠️ Legal Note: Mobile extraction often requires warrants/court orders—consult legal counsel before proceeding.
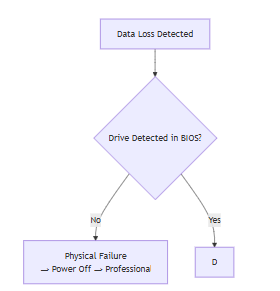
5. Tool Selection Workflow
6. Critical Best Practices
- Stop using the device immediately—every write risks overwriting recoverable data
- Create a forensic image first—work on the image, never the original media
bash
# ddrescue example (Linux/WSL)
ddrescue -f -n /dev/sdX /mnt/backup/image.img /mnt/backup/logfile.log
- Never recover to the same drive—use separate healthy storage
- Document everything—for legal/forensic cases, maintain chain of custody logs
- Test recovery on non-critical data first—validate tool effectiveness before full scan
- For encrypted drives: Recovery is impossible without keys—focus on key recovery first
7. Limitations to Understand
| Scenario | Recovery Feasibility | Why |
| SSD with TRIM enabled (hours after deletion) | ❌ Very low | TRIM instructs controller to erase blocks immediately |
| Overwritten data (new files written) | ❌ None | Magnetic/optical media overwrites are permanent |
| Physically scratched platters | ❌ None | Magnetic coating destroyed—no signal to read |
| Encrypted drive without key | ❌ None | Mathematically impossible (AES-256) |
| Formatted drive (quick format) | ✅ High | Only file system metadata erased; data intact |
| Formatted drive (full format on HDD) | ⚠️ Medium | Windows 10+ full format writes zeros—partial recovery possible |
8. Recommended Toolkit for IT Professionals
| Purpose | Tool | Cost |
| First responder kit | TestDisk + PhotoRec (USB bootable) | Free |
| Daily workstation recovery | Recuva (quick) + R-Studio (deep) | Free + $80 |
| Server/RAID recovery | UFS Explorer Professional | ~$150 |
| Forensic imaging | ddrescue (Linux USB) + Tableau write blocker | Free + $400 |
| Physical failure triage | PC-3000 Express (entry-level) | ~$1,500 |
| Emergency contact | Pre-vetted recovery service (e.g., DriveSavers) | N/A |
Final Recommendation
- For accidental deletion/formatting: Start with Recuva → TestDisk → R-Studio/UFS Explorer if needed
- For physical failures: Power off → contact professional service—do not attempt DIY
- For enterprise environments: Standardize on UFS Explorer or R-Studio + maintain forensic imaging capability
- Always pair with: A robust 3-2-1 backup strategy—recovery tools are a last resort, not a backup replacement
🔐 Remember: No tool can recover data that has been securely erased (DoD 5220.22-M), overwritten, or lost to physical media destruction. Prevention through backups remains the only 100% reliable “recovery” method.
Bad Sector Recovery & Data Extraction: Practical Guide
Bad sectors—damaged storage areas that can’t reliably hold data—require a careful, methodical approach. Aggressive recovery attempts can worsen damage. Below is a battle-tested workflow used by data recovery professionals, with tool recommendations for each phase.
1. Understanding Bad Sectors: Critical Distinctions
| Type | Cause | Recoverable? | Detection Method |
| Logical (Soft) Bad Sectors | File system errors, improper shutdowns | ✅ Often repairable via chkdsk /f or surface remap | S.M.A.R.T. Reallocated Sectors Count unchanged |
| Physical (Hard) Bad Sectors | Platter scratches, head crashes, media degradation | ⚠️ Controller remaps automatically until spare blocksare exhausted | Rising Reallocated Sectors Count, Pending Sectors, audible clicking |
| SSD Wear-Out Blocks | NAND cell exhaustion (limited P/E cycles) | ⚠️ Controller remaps automatically until spare blocks exhausted | Media Wearout Indicator, Available Spare dropping |
⚠️ Critical Insight: You cannot “repair” physical bad sectors—the magnetic surface or NAND cells are permanently damaged. Recovery focuses on extracting data before failure worsens and letting the drive’s firmware remap sectors.
2. Detection & Diagnostics Phase
🔹 Step 1: Check S.M.A.R.T. Attributes
Use these tools to assess severity:
| Tool | Command/Action | Critical Attributes to Monitor |
| Hard Disk Sentinel | GUI → Health tab | Reallocated Sectors Count, Current Pending Sector Count, Uncorrectable Sector Count |
| CrystalDiskInfo | Free GUI | Same as above + “Caution”/”Bad” status indicators |
| smartctl (CLI) | smartctl -a /dev/sdX | ID 5 (Reallocated), 197 (Pending), 198 (Uncorrectable) |
✅ Action Thresholds:
- < 50 reallocated sectors: Monitor; schedule replacement within 30 days
- 50–200: Urgent backup + replacement within 7 days
- > 200 OR rising daily: Power off immediately—drive is failing catastrophically
🔹 Step 2: Surface Scan (Non-Destructive)
Identify exact sector locations without writing:
| Tool | Platform | Command/Workflow |
| Victoria | Windows/DOS | Tests → Read → maps bad sectors visually; supports “remap” function |
| HDDScan | Windows | Read Test → logs LBA addresses of errors |
| badblocks | Linux | badblocks -sv /dev/sdX (read-only mode) |
⚠️ Warning: Avoid “write tests” (badblocks -w) on failing drives—they accelerate failure.
3. Data Recovery Workflow (Failing Drive with Bad Sectors)
📌 Golden Rule: Image First, Recover Later
Never run recovery tools directly on a failing drive. Create a sector-by-sector image first.
mermaid
🔹 Phase 1: Imaging with Error Tolerance
| Tool | Best For | Key Feature | Command Example |
| ddrescue (GNU) | Linux/WSL/macOS | Skips bad areas → retries later → minimizes stress | ddrescue -d -r3 /dev/sdX image.img logfile.log |
| HDDSuperClone | Windows/Linux | “Adaptive read” slows on errors; preserves drive life | GUI wizard or CLI: hddsuperclone –drive=/dev/sdX image.img |
| Roadkil’s Unstoppable Copier | Windows GUI | Copies readable files first; skips errors gracefully | Point-and-click interface |
| DMDE | Windows | Fast imaging + immediate file recovery from image | Built-in disk imaging module |
💡 ddrescue Pro Tips:
bash
# First pass: quickly copy all good areas
ddrescue -f -n /dev/sdX image.img logfile.log
# Second pass: retry bad areas with trimming
ddrescue -d -r3 /dev/sdX image.img logfile.log
# Third pass: fill zeros in unrecoverable areas (optional)
ddrescue -f –fill-mode=? /dev/zero image.img logfile.log
- -d: Direct disk access (bypasses OS cache)
- -r3: Retry bad sectors 3 times before skipping
- Always use a logfile—allows resuming interrupted imaging
🔹 Phase 2: Sector Remapping (Limited Use Cases)
⚠️ Only attempt if the drive is still operational AND you’ve already imaged data
| Tool | Method | Risk Level |
| Victoria (DOS version) | Remap function writes to bad sector → triggers firmware remap | ⚠️ Medium—may cause drive to hang |
| MHDD | R command forces remap | ⚠️ High—aggressive; can brick drive |
| Windows chkdsk /b | Clears bad cluster list (NTFS) | ✅ Low—safe but doesn’t fix physical damage |
❌ Never remap sectors on a drive containing your only copy of critical data—imaging must come first.
🔹 Phase 3: File Recovery from Image
Once imaged, treat the .img file as a virtual drive:
| Tool | Technique | Command/Workflow |
| R-Studio | Mount image → scan for partitions/files | File → Open Disk Image → Analyze |
| TestDisk | Raw carving when file system is destroyed | testdisk image.img |
| PhotoRec | Fast file recovery from an image | photorec image.img |
| DMDE | Raw carving when the file system is destroyed | Open image → Full Scan → Copy files |
4. Physical Bad Sector Reality Check
| Symptom | Likely Cause | Recovery Feasibility | Action |
| Clicking/grinding noises | Head crash, stiction | ❌ DIY impossible | Power off → professional cleanroom recovery |
| Intermittent detection (BIOS sees the drive sometimes) | Bad sectors in critical areas (MBR, partition table) | ⚠️ Partial recovery possible | Image with ddrescue/HDDSuperClone |
| Intermittent detection (BIOS sees drive sometimes) | PCB/electronics failure | ⚠️ May recover with PCB swap | Match donor board (same firmware rev) |
| “Disk read error” on boot | Drive detected, but freezes on access | ✅ High (if rest of drive healthy) | Image → repair MBR with TestDisk |
💡 Cost-Benefit Decision:
- Data value < $300 → DIY imaging with ddrescue
- Data value $300–$1,500 → Professional recovery service
- Data value > $1,500 → Enterprise-grade recovery (cleanroom)
5. Prevention & Mitigation Strategies
| Strategy | Implementation | Effectiveness |
| Early detection | Weekly S.M.A.R.T. scans with Hard Disk Sentinel alerts | ✅ High—catches degradation before failure |
| Proactive replacement | Replace drives at 50+ reallocated sectors OR 3+ years old | ✅ High—prevents emergency recovery |
| RAID 1/10 | Mirroring provides redundancy during sector remapping | ✅ Medium—doesn’t prevent loss but avoids downtime |
| TRIM management (SSDs) | Avoid aggressive TRIM on critical data drives | ⚠️ Low impact—SSDs handle wear leveling internally |
| Cooling | Keep HDDs <40°C ambient temperature | ✅ Medium—heat accelerates mechanical wear |
6. Tool Recommendations by Scenario
| Scenario | Recommended Tool(s) | Why |
| Home user: deleted files + minor bad sectors | Recuva → HDDSuperClone → R-Studio | Gentle imaging + simple recovery workflow |
| IT Pro: server drive with growing bad sectors | ddrescue (Linux live USB) → UFS Explorer | Scriptable, error-tolerant imaging + enterprise file systems |
| Forensic: evidence preservation | Tableau write blocker + ddrescue | Chain-of-custody compliant; bit-perfect imaging |
| Critical data + physical failure | Power off → DriveSavers/Ontrack | Cleanroom required for platter/head work |
| Quick triage (no install) | Hiren’s BootCD PE (includes Victoria, HDDSuperClone, TestDisk) | All-in-one USB toolkit for field recovery |
7. Critical “Do Not” List
❌ Do NOT run chkdsk /r on a drive with physical bad sectors—it forces repeated reads of damaged areas, accelerating failure
❌ Do NOT freeze a clicking drive (myth)—condensation causes more damage
❌ Do NOT open HDDs outside a Class 100 cleanroom—dust destroys platters instantly
❌ Do NOT attempt recovery without first creating an image—every access risks further damage
❌ Do NOT ignore rising reallocated sector counts—this is your early warning system
8. Real-World Recovery Example
Scenario: 4TB WD Red NAS drive with 127 reallocated sectors; NAS reports “degraded” array
Action Taken:
- Removed the drive from the NAS immediately
- Connected via SATA-to-USB to a Linux laptop
- Ran ddrescue -d -r2 /dev/sdb nas_drive.img logfile.log (completed in 18 hrs with 0.3% unreadable sectors)
- Mounted nas_drive.img in R-Studio → recovered 99.7% of files
- Replaced drive in NAS; rebuilt array from healthy drives + recovered data. Result: Zero data loss; avoided $1,200 professional recovery fee
Final Recommendation
For bad sector recovery, prioritize gentle imaging over aggressive repair:
- Detect early with S.M.A.R.T. monitoring (Hard Disk Sentinel)
- Image immediately with error-tolerant tools (ddrescue/HDDSuperClone)
- Recover from image—never the original drive
- Replace the drive—bad sectors indicate end-of-life; remapping is temporary
🔐 Remember: Bad sectors are a symptom of drive mortality. No tool can resurrect physically destroyed media. Your best “recovery tool” remains a tested backup following the 3-2-1 rule.
6. Prevention > Recovery
- 3-2-1 Backup Rule: 3 copies, 2 media types, 1 offsite/cloud copy
- Regular verification: Test restores periodically
- RAID ≠ Backup: RAID protects against hardware failure, not deletion/corruption/ransomware
- Immutable backups: Protect against ransomware via write-once storage or air-gapped copies
7. Limitations to Understand
- SSDs with TRIM: Recovery success drops dramatically after deletion.
- Encrypted drives: Without keys/passphrases, recovery is impossible even if the data is intact.
- Physical platter damage: Scratched magnetic surfaces often mean permanent data loss.
- Time sensitivity: For mechanical failures, early intervention improves success rates.